The Ultimate Guide to Building a House Extension
Table of Contents for Easy Navigation
Please click one of the Chapter Titles below to jump to the relevant section:
-
Cost of a House Extension
-
A single storey extension
-
A two storey extension
-
Adding kitchens and bathrooms
-
Budgeting for and planning extensions
-
Calculate your budget
-
Look out for available grants
-
Speak to builders and architects
-
Compare quotes
-
Financing your house extension
-
Borrowing options
-
Re-mortgaging your current home
-
Home Improvement Loans
-
Personal loans
-
Bridging loans
-
Top tips for borrowing funds
-
Planning Permission and Approval
-
Party wall agreement
-
Planning permission
-
Building regulations
-
How to apply
-
Pre House Extension Checklist
-
Renovation insurance
-
Double check plans and permission forms
-
Protect your property
-
Building the House Extension
-
Possible delays
-
Turning your House Extension into a Kitchen or Bathroom
-
Bespoke or fitted kitchen or bathroom
-
Cost of fitted and bespoke bathrooms and kitchens
-
Pros and cons of fitted and bespoke
-
Speak to interior designers and approve a design
-
Design and layout considerations
-
Choose fixtures and fittings
-
Cupboards and colour scemes
-
Appliances and suites
-
Kitchen surfaces
-
Elecrtics, gas, and plumbing
-
Installing units and appliances
-
Decorating and Finishing Touches
-
Ideas for decorating
-
Choose your materials and colour scheme
-
Hire a decorator
-
Choose flooring
-
Hardwood, carpet, lino, or tile
-
Finishing touches and accessories
-
Buy furniture
-
Choose accessories
-
Have an extension that you want turning into a kitchen or bathroom?
In a recent survey carried out by Money Supermarket, it was found that 42% of UK homeowners would rather build a house extension than move home in order to have property that meets their needs. Less than ¼ of homeowners believe that moving house is a smart financial choice because of the current state of the property market.
So, with almost half of UK mortgagees opting to extend, we thought we’d create an ultimate guide to building an extension that takes you through the entire process, one step at a time.
Cost of a house extension

The first major step in any extension is weighing up the costs of completing the job. The price of extensions varies drastically and depends on a number of factors like the kind of extension you’re after, and the location of the property.
When it comes to extensions, there is no specific average cost because each extension differs from the next. According to a number of other articles, an estimate for the average cost of extensions per square meter is around £1,500, rising to as much as £2,500 for more complex structures. This excludes the 10-15% that’s added on to cover VAT and professional fees.
Single storey extension
A single storey extension that measures 5m x 5m would cost around £37,500 in areas outside of London. With properties situated inside London, a 5m x 5m extension would cost upwards of £62,500. Once the 10-15% cost of VAT and professional fees has been added on, single storey extensions can cost between £41,250 and £71,875.
A two storey extension
The general rule of thumb for a two storey extension is to add 50% onto the cost of a single storey extension. For example, a 5m x 5m one story extension costs around £37,500, so a two storey extension of the same size would cost £56,250. As mentioned above, for properties inside London, the cost may be much higher. With professional fees and VAT added, a 5m x 5m two storey extension would be roughly £61,875.
Adding kitchens and bathrooms
Extending kitchens and bathrooms usually increases the cost of a house extension because of the additional plumbing work and installation of appliances.
On average, adding a bathroom to an extension plan can increase the cost by around £5,000. However, this does depend on the finishes you select as well as what the bathroom consists of (bath, shower, wet room etc).
Kitchens increase the cost even further by around £10,000. This price is for a mid-range kitchen so the type of kitchen you select will cause it to fluctuate.
Budgeting for and planning extensions

There’s no point falling in love with the idea of an extension if the type you want is way out of your price range. That’s why, in order for your house extension to go as smoothly as possible whilst still being affordable, it’s vital that costs are kept firmly within your budget – something that requires a lot of time and attention.
Calculate your budget
In order to determine the size your budget needs to be, it’s important to decide the type and size of extension you require, and find out a rough cost of planning and building it (see above). However, you also need to figure out how much of your own money you have to put towards the build, and whether or not you have access to other funds. Once you have a clear idea of your total available funds, you’ll have a solid budget to finance the extension.
Look out for available grants
There are a number of available grants offered by the government that can be used to help with the cost of renovating and extending a property – especially if you are a foster carer or are living with someone that is physically disabled. Most government grants are usually only available to those with low incomes, and those that live in properties that are severely damaged and are a health and safety risk.
Two of the grants you may be entitled to include:
-
-
- Disabled Facilities Grant
-
A Disabled Facilities Grant is available to owner occupiers, landlords, or private tenants that need to carry out adaptations to a property in order to make it suitable for a person with disabilities. The grant is usually used to improve access to bathrooms, living rooms, and bedrooms; to provide additional bathroom facilities; or to make changes to heating and lighting systems and controls.
The amount of the grant given depends on the total cost of the work required, as well as your personal financial circumstances. Sometimes, a contribution may need to be made towards the cost of the work, although, if the adaptations are for a child, no contribution is required.
-
-
- Foster Carer Extension Grants
-
Foster Carer Grants are accessible by foster carers that need to extend their home in order to house children. There are no specific conditions to the grant; however, there are repayment conditions.
If the property is sold within one year of the extension being added, the grant amount must be paid back in full. This reduces over the course of a 5 year period. If the property is sold 5 years after the extension was completed, no repayment is needed. Furthermore, if the property is a Registered Social Landlord property, no repayment is required at all.
Speak to builders and architects
The next step in determining a budget for a house extension is to speak to a variety of builders and architects about the full potential of the extension, and the total cost of designing and building it. As industry professionals, they’ll be able to offer advice on how much you’ll need to spend to achieve your dream extension. They will also be able to offer guidance on ways you can save money during the build and how your budget should be distributed.
Whilst speaking to different architects and builders, you may find that one matches your vision for the extension who gives you a quote for the work. At this point, it’s time to shop around and find the best deal.
Compare quotes
It’s at this stage that you are able to get a much more clear idea on how much your extension is going to cost. Conduct some research into a variety of architecture and construction firms in your area and email them with the rough specifications of the extension, such as the number of storeys, the size, and any unique features you’d like to include. Many firms will have a contact form on their website and will contact you directly with a quote.
When you’ve received quotes from each of the companies you’ve contacted, you’ll need to start deciding which one you’d like to carry out the work. Try to remember that you shouldn’t just consider the cost they’ve quoted, but also any reviews on previous work that they’ve completed.
The quote you select, along with any grants you’re entitled to, will give you a clear idea of how much the extension is going to cost and therefore indicates your required budget.
Financing your house extension

In one survey conducted by Money Supermarket, it was concluded that 45% of homeowners would use their savings to fund a property extension, and 16% would take out a personal loan. However, not everyone has a large enough amount of personal savings to cover the cost of their extension. That’s where borrowing comes in to play.
Borrowing options
Banks, building societies, and mortgage lenders are all usually happy to lend money to home owners that want to extend their house. That means that there are a number of different borrowing options to choose from – you just have to find the one that’s best suited to you.
The amount lenders will allow homeowners to borrow is dependent on a variety of factors, including sole or joint income, necessary expenditure, and amount of disposable income. If you are self-employed, lenders may be more hesitant in allowing you to borrow because you have no amount of guaranteed income.
In most cases, you’ll also require a deposit to secure the money you borrow. This usually tends to be around 15-20% of the total budget and can be covered using savings, money from the sale of assets, or borrowing.
Re-mortgaging your current home
Home owners have the option to remortgage their property in order to free up funds that can be used to pay for the extension. It’s usually a more affordable option than taking out a bridging loan, although evidence must be provided to show that the mortgagee can afford the additional repayments.
The amount that can be borrowed depends on the current value of the home minus what is owed on the existing mortgage (home equity), as well as the amount of value the extension may add to the property.
Home improvement loans
There are two types of home improvement loan: secured and unsecured. A secured loan is used for expensive and more complex house extension projects. Unsecured loans are used for smaller building projects, usually no more than £25,000, and have a fixed interest rate.
It’s better to think of a secured home improvement loan as a second mortgage because of the amount of time it takes to pay the balance. Most banks will offer up to £500,000 at an interest rate of between 3.5% and 5%. Applicants also have to have a good credit score and a regular income to be eligible.
Personal loans
Personal loans are an option for people that don’t own a property and therefore don’t have the option to remortgage. They are a more expensive way of borrowing so it’s best to compare lenders to get a good deal. Select the lender that offers a high advance on the loan in order to minimise interest payments.
The highest personal loan amount available from most lenders is £25,000 which can be repaid over 10 years. The amount of interest charged and the average monthly repayment is based on credit score: the better the score, the lower the interest rate.
Bridging loans
A bridging loan is used to cover any gaps between when funds are required and when funds become available. For example, processing a large loan from a bank to purchase a property at auction can take a considerable amount of time. In instances where the funds are required to purchase the property, before the bank loan has been processed, bridging loans can be used instead, whilst the larger bank loan is processed. Once the bank loan comes through, the bridging loan can then be paid off.
This type of loan is easier to arrange for those with a lower income; however, you should keep in mind that interest rates, admin fees, and legal fees are expensive.
Top tips for borrowing funds
Here are a few things you should bear in mind when planning to borrow money to cover the cost of a house extension:
-
-
- Due to the fact that arranging finance can take weeks to complete, don’t start looking for renovation deals until you have been approved to borrow the required amount
- Don’t just visit one lender and select the first deal you’re offered; shop around instead to ensure you get the best deal available
- Finally, when budgeting for your extension, try to include a 15% contingency fund to cover any extra things that may become apparent during the build
-
Planning Permission and Approval
Sometimes, getting the necessary permission to complete an extension can be the most time consuming and complicated step of the entire process. This is due to the fact that there are a variety of different types of permission and approval you may need to apply for, and figuring out which ones you require is a challenge. We’ve lined up the tree most common types of approval you’re likely to need when building a house extension.
Party Wall Agreement
It’s only in some instances that planning permission is required for an extension; however, party wall agreements with neighbours will need to be completed if your property:
-
-
- Shares a wall with one or more neighbouring properties and divides the homes of two separate owners
- Will be digging new foundations for the extension
- Is undergoing a loft conversion
-
The first step is to serve any neighbours that will be affected by the extension with a Party Wall Notice. Once all relevant parties have received this, a surveyor is required to prepare a Party Wall Award. The Award details how the work should progress, and any conditions the neighbours have accepted. When all parties are satisfied, the Party Wall Agreement is awarded to the homeowner who can then begin the extension process.
Planning permission
In the UK, planning permission for extensions isn’t always required: it depends on the type of property you have; it’s location; and the size of the proposed extension. Planning permission is not required if:
-
-
- The extension is no larger than half the area of land around the original house
- The extension isn’t forward of the principal or side elevation onto a highway
- The extension isn’t higher than the current highest point of the roof
- A single storey extension (rear and side) is no higher than 4 meters tall
- Single storey extensions mustn’t extend beyond 3 meters of the original house wall if attached, and 4 meters if detached
- Single storey side extensions must not exceed a width of half the original home
- Extensions of more than one storey must not extend beyond the rear wall of the original property by more than 3 meters
- Two storey extensions aren’t closer than 7 meters to the rear boundary
- The extension is built from materials that look similar to those used on the original house
- The extension doesn’t include balconies, verandas, or raised platforms
- All upper-floor side facing windows are obscure-glazed and must be 1.7m higher than the floor
-
These conditions must be adhered to in order to not require planning permission; however, the conditions are different for apartments, flats, and maisonettes. Furthermore, there are also different planning restrictions for properties that are listed buildings: In which case, Listed Building Consent will need to be obtained, and you will be expected to apply for planning permission. This is also similar to that of houses located in conservation areas, national parks, World Heritage Sites, and Areas of Outstanding Natural Beauty.
If unsure on whether planning permission is required, speak to your Local Planning Authority. They’ll be able to talk you through the documentation and permission you are required to obtain.
Building Regulations Approval
Building Regulations Approval is required for house extensions and alterations to properties if the following needs to be carried out:
-
-
- Replace fuse boxes and connected electrics
- Install a bathroom that will involve plumbing
- Change electrics near a bath or shower
- Put in a fixed air-conditioning system
- Replace windows and doors
- Replace roof coverings on pitched and flat roofs
- Install or replace a heating system
- Add extra radiators to a heating system
- Prepare for the arrival of builders
-
The only time approval isn’t needed for changes such as those listed above is if the changes are completed by tradesman registered on the Competent Persons Register. This is a register of tradesmen that have undergone a series of checks to demonstrate they are competent to complete a specific set of jobs.
How to apply
In order to apply for Buildings Regulations Approval, you need to contact a ‘building control body’ (BCB) to check the relevant building regulations and apply for approval to carry out the extension.
There are 2 different types of BCB: Local authority BCBs and Private BCBs. Local authority BCBs involve applying for permission from the local council, whereas, Private BCBs involve applying through a private approved inspector.
Pre house extension checklist
Once you’ve decided on the type of extension you’re having built, figured out a budget, and been given consent, the next step is to prepare all paperwork for the extension protect your existing property. This is the final stage of planning an extension before the construction work actually begins.
Renovation insurance
Before starting an extension, there are two ways that your property needs to be protected: Physically, to prevent damage to furniture and flooring, and legally, through Renovation Insurance.
One thing that many property owners are unaware of is that their current home insurance provider is not likely to cover their property if structural changes are made – this includes extensions and any other major renovation work. Builders have Liability insurance which covers homeowners for any damage to their property, but it’s still wise for property owners to take out a renovation insurance policy of their own.
Renovation insurance protects you, the homeowner, if your property suffers any structural damage as a result of the work. In most cases, policies can be taken out for both short term and long term projects, and some even protect properties that are vacant whilst work is being completed.
Make sure you compare several renovation insurance quotes in order to find the best deal, and speak to your current home insurance provider to find out if they offer renovation insurance. Bear in mind, however, that in order to receive accurate quotes, you will need to state the expected cost of the extension, along with a time frame in which the work will be completed.
Double check plans and permission forms
Once you have organised renovation insurance, the next step is looking over all paperwork related to the extension to double check that it is correct. Make sure that you have all permissions in place, and take another look at the extension plans to ensure you’re still totally happy with the work that is going to be carried out.
If you do decide to make any changes to the plans, you will need to notify the construction firm carrying out the build, as well as the architect you used to design the extension. It’s better to make adjustments before any construction work begins to ensure that the building process runs a smoothly as possible.
Protect your property
Although the construction company will use sheets and coverings to protect elements of your property, such as the flooring and walls, try to empty the room nearest to the extension site as well. Not only does this give the builders somewhere to store any equipment that needs to be kept inside, it also prevents any fixtures and fittings becoming dusty or damaged. Tarpaulin sheets are one of the best things to use to protect furniture, as well as spare sheets.
If you’re planning to redecorate your existing property after the extension has been completed, you won’t need to worry about protecting your furnishings – it’s just something to keep in mind if you aren’t planning a refurbishment.
Building the house extension
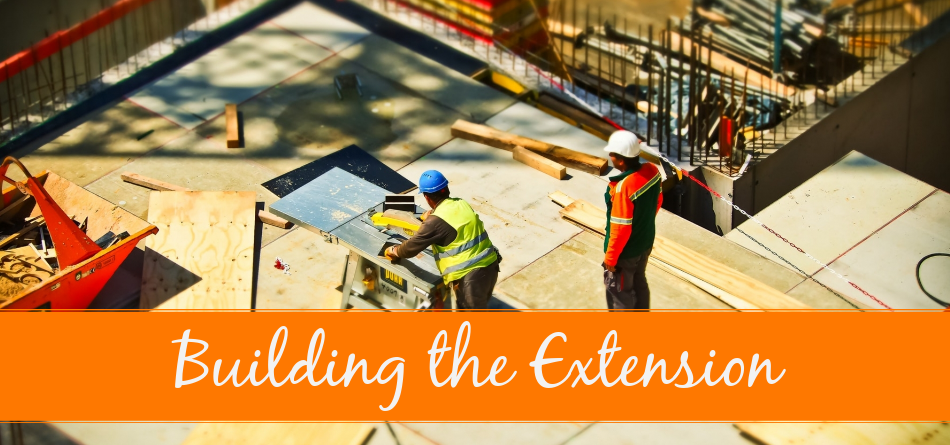
The first part of any house extension is the structural changes to your property and any necessary installations that need to be carried out. It’s at this stage that you begin to witness your new extension coming to life, and your existing property becoming a construction site.
Extensions are broken down into stages: Foundations and groundwork, ground and low-level work, and external and internal walls. These initial three stages form the basis of the extension and ensure that it becomes a liveable structure.
-
-
- Foundations and groundwork
-
Structural changes involve foundations being laid down and reinforcement bars are inserted if necessary. Once the foundations have been laid, Building Control with check their width, depth, and reinforcements. Concrete is poured into the foundations and Building Control approves them.
-
-
- Ground and low-level work
-
When the foundations are set and all initial groundwork has been completed, trenches and drains are dug and bricklayers begin constructing and damp proofing the walls. The damp course, lintels, and installations are then added and concrete is poured and allowed to set to create the floor.
-
-
- External and internal walls
-
During this stage, bricks are laid and cavity wall insulation is installed. Window and door frames are then added, and internal blocks are laid.
-
-
- Roof structure and covering
-
Once all walls have been completed, it’s than time to build the roof frame and add in any roof windows or domes if requested. When the roof structure has been built, roofing felt is laid and roofing battens are secured in place. Roof tiles, cement ridges, hips, valley tiles, roofline fascias, soffits, and bargeboards are then installed, and floor screed can be laid and left to set.
-
-
- Guttering, windows, doors, and rendering
-
At this stage, windows and doors can be fitted to the frames and external walls are rendered if necessary. Guttering, rainwater pipes, electric wiring, and plumbing are also installed to ensure the extension has water and electricity.
-
-
- Knock through and plastering
-
Upon completion of the extension structure, it’s then time to knock through the extension into the existing property to create an opening. This is only required if the extension has been added to a wall with no doorways and differs if the extension is a conservatory. Lintels and pad stones are added and require approval from Building Control. Finally, plaster boarding and plastering can take place.
-
-
- Final work
-
Final work on the extension involves completing all electric and plumbing work such as attaching light fittings, switches, and sockets, as well as taps and connections. After this stage, the extension structure is complete we can move on to the next step – painting and decorating.
Possible delays
Although you will be given an estimate of when your extension is expected to be completed, delays and hold ups can still occur, so try not to set your heart on a specific completion date. Delays in the construction industry are common and are usually a result of trade delays. With a variety of tradesmen working on the same project, each being required for a different job at a different stage of the build, any delays in early work can have a significant impact.
Turning your house extension into a kitchen or bathroom
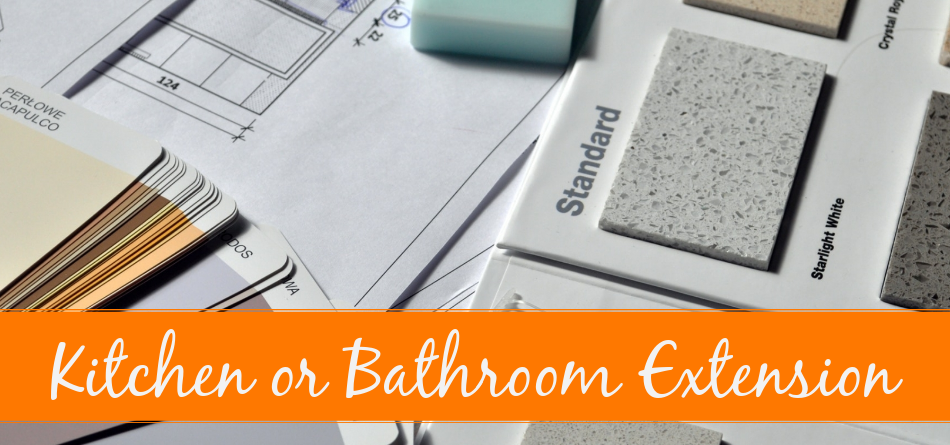
Most people would prefer to have an extra bathroom or a larger kitchen in their property which is why many choose to convert their extension into one. In fact, bespoke kitchens can increase the value of a property by up to 4% (£8,000 on a £200,000 house), and bathrooms can add between 3 and 5% (£6,000 to £10,000 on a £200,000 house).
The process of turning an extension into a bathroom or kitchen takes a little more time because of the additional design plans that need to be drawn up. However, when the extension has been built, creating and installing a bespoke kitchen only takes 2-6 months depending on its size and complexity, and bathrooms take around 4-6 weeks to complete.
However, before it comes to fitting a new bathroom or kitchen, there are a few steps you need to complete first.
Bespoke or fitted kitchen or bathroom
The first step is deciding whether you’d like a fitted kitchen or bathroom, or a bespoke one. Both offer their own pros and cons, and ultimately, the decision should be based on your budget and what you’d prefer.
Cost of fitted and bespoke bathrooms and kitchens
Bespoke kitchens and bathrooms can vary drastically in price because it depends on the fixtures and fittings selected, the location of the property, and the construction company carrying out the work. The best option is to request quotes from several construction companies to find a good deal. As a baseline cost, bespoke bathrooms can average between £4,000 and £8,000+ whereas bespoke kitchens vary from £10,000 to £20,000+.
Fitted kitchens and bathrooms usually cost significantly less than bespoke ones and are, therefore, a good option for homeowners that have a smaller budget.
Fitted bathrooms start from around £2000 which covers all aspects of plumbing, gas, electrics, installation of the suite, as well as vinyl flooring and tiled walls. However, this is the cost without any redesign work and with low-mid range suites. Fitted kitchens start from around £4,000 including fitting for a baseline model, and £10,000 for a mid range one.
Pros and cons of fitted and bespoke
There are a variety of pros to having a fitted kitchen or bathroom. Three of these include:
-
-
- Good value for money for homeowners that have a modest budget
- Plenty of options, styles, and colours to choose from
- Can be installed in a relatively short period of time
-
Some of the cons of having fitted kitchens and bathrooms instead of bespoke ones include:
-
-
- Less design choice compared to bespoke
- Not as high quality because of lower cost materials
- Not tailored to your specific lifestyle and family dynamic
-
From our perspective, as industry professionals with over 10 years of experience in construction and trade, we’d always recommend customers opt for a bespoke kitchen or bathroom if their budget allows because they offer several additional benefits compared to fitted kitchens and bathrooms. Here are some positives of having a bespoke kitchen or bathroom instead of a fitted one:
-
-
- Tailored to your lifestyle and family dynamic in a way that suits you
- Unlimited design choice
- Can be built to fit rooms of any shape and size
- Lasts longer because of better quality materials
-
A few of the down sides to bespoke kitchens are:
-
-
- Take longer to complete because time is needed to draw and plan the initial design
- More expensive because they’re tailor-made
-
Speak to interior designers and approve a design
The next step in having a bespoke kitchen or bathroom is speaking to an interior designer and asking them to draw up a plan for the design. Find out which interior designers are the most recommended in your area by looking online, and don’t forget to read their reviews.
Your designer will be able to offer advice on how to best utilise the space you have available, whilst giving you a kitchen or bathroom that is suited to you and your family’s needs. They may also be able to make suggestions regarding the design that you hadn’t thought of.
Design and layout considerations
In order for interior designers to come up with a design that’s suited to you, ask yourself a few questions about your current kitchen and bathroom, and about your new kitchen and bathroom. Doing this will allow you to establish your requirements for the new design.
Some examples of questions to ask about your kitchen are:
-
-
- Do you have enough storage space?
- Will you be using it purely to cook or would you like it to become a family room?
- How much natural light does it get and how could you make it brighter?
- Do you need a breakfast bar or island?
-
A few questions you should ask about your bathroom are:
-
-
- Do you need a bath or is a shower enough?
- Do you need storage space for towels and toiletries?
- What’s the best way to make the most of the space available?
- Would you like a different shaped bath?
-
Once you asked yourself some of these questions and discover your requirements, likes, and dislikes, you’ll have much more of an idea about the kind of kitchen or bathroom that would work best for you.
Choosing fixtures and fittings
When you’ve decided on the layout of your new kitchen or bathroom, the next step is to begin choosing the fixtures and fittings. Try to make sure that the fixtures and fittings you pick will stand the test of time and of a high quality.
If you need any advice surrounding where to shop, or if you have a style in mind and you’re unable to find what you’re looking for, speak to your interior designer. They’ll know a variety of places that offer the style you love that you, otherwise, may not have come across.
Cupboards and colour scheme
Regardless of whether your house extension is becoming a kitchen or a bathroom, it’s still important to choose an overall colour scheme. Try to consider how much natural light your extension has, as well as its size when choosing the colour scheme: Darker colours can make rooms appear smaller, whereas brighter colours reflect light and make rooms appear more spacious.
When you’ve decided on a colour scheme for your units and tiles, you can then shop around for kitchen and bathroom cupboard doors that match. For bathroom cabinets, we recommend wood to create a rustic and timeless finish. When it comes to kitchens, you may prefer to have something a little more modern, in which case, an ultra gloss finish might be just what you’re looking for.
Appliances and suites
The biggest part of any kitchen design is the appliances – especially considering they not only need to be practical, but also add to the overall aesthetic. From touch screen appliances and glass hobs, to more traditional ovens and vintage-style appliances, there are plenty of options to choose from.
The kitchen design created by your interior designer can be adjusted to fit specific appliances such as larger ovens, so don’t panic if you fall in love with an appliance that’s a different size to what you initially thought.
If your house extension is being turned into a bathroom, you won’t need to decide on any appliance, but you will need to choose a bathroom suite you love. Try researching different styles online to see what jumps out at you.
Kitchen surfaces
Kitchen work surfaces are used for prepping and serving food on a daily basis, so they need to be able to withstand regular cleaning. They’re a natural focal point in any kitchen and should also be used to compliment the cabinets and flooring. Due to the fact they’re to be used several times a day, it’s important that you choose a style that you like the look of, as well as a material that is well suited to your lifestyle.
The main aspect of kitchen surfaces that you need to consider is their durability. Every countertop material provides different levels of durability and style, so it’s about finding the right one for you. The most popular materials for worktops are granite, quartz, hardwood, and laminate which are all relatively easy to clean.
Granite and quartz are the two most expensive options, but are favoured by many homeowners because of their sturdiness and aesthetic. Furthermore, once installed, neither requires and maintenance. Hardwood surfaces are slightly less expensive and still look stunning, although they do require bi-annual oiling to keep stains at bay. The final option is laminate, an option favoured by those with a slightly smaller budget. The great thing about laminate is that it can be made to look like more expensive materials and it’s scratch and heat resistant.
Electrics, gas, and plumbing
If your house extension is being built in order to add a bathroom or kitchen to your property, builders need to be made aware before any wiring or plumbing can be installed because it will determine the placement of sockets and pipes. However, if you’ve decided to turn an existing extension into a kitchen or bathroom, it’s at this stage that all electrics, gas, and water pipes are added.
In order for all gas and electric work to be carried out safely, a qualified electrician and a Gas Safe registered plumber or engineer is required. Once this has been carried out and checked, the final step of building the kitchen or bathroom is to install the unit, appliances, or the suite.
Installing units and appliances
It’s at this stage that the whole design drawn up by the interior designer comes together. In the case of a kitchen, the oven, dishwasher, washing machine and the tumble dryer are connected to the gas and electric mains. Other appliances such as the fridge freezer can be added after the extension has been decorated.
If you’re extension is becoming a bathroom, radiators need to be connected, and the bathroom suite you’ve selected is installed.
Decorating and finishing touches
When all structural work has been completed, and your house extension has electricity, gas, and water, it’s time to start decorating and adding in the finishing touches. This includes laying down flooring, deciding on a colour scheme, and everyone’s favourite part – going furniture shopping!
This is usually the fastest part of the entire process and it’s the stage when you’re extension begins to feel like part of your home.
Ideas for decorating
If you’re struggling with ideas on how to decorate your new extension, there are plenty of places you can get a little inspiration. Looking in house magazines at the latest home decor trends and using Pinterest to find new layout styles are just two ways to find ideas that would work with your extension.
By doing your research, you’ll also come across different colour schemes that you might not have otherwise considered.
Choose your materials and colour scheme
When you’ve gathered ideas, it’s time to decide on a colour scheme and an overall aesthetic for the extension. Head to a local DIY store to browse their wall paper range and choose paint colours that compliments it – you should have an idea on the colour scheme from doing research.
If you aren’t sure on the amount of paint and wallpaper you require, it’s always better to buy more than you think you’ll need, and return any that isn’t used. This way, you don’t risk needing to buy an extra roll of wallpaper and it being out of stock.
Hire a decorator
Similarly to finding a builder or an architect, when hiring a decorator, we recommend contacting some of the best ones in your area or the location of the property and collecting a variety of quotes. This will not only give you a clue on the average cost of decorating your extension, but also ensure you get the best possible deal.
Make sure you read online reviews left by people that have used the decorator before, and look at before and after photos of their work.
Choose flooring
Now that you’ve found a decorator who can begin painting and wallpapering the house extension, it’s time to choose the flooring. Most flooring companies run regular offers so you should be able to pick up a good deal on the flooring you choose. Furthermore, the companies that supply the flooring also offer a ‘fitting’ service for an additional fee, so you won’t have to worry about finding someone to lay it.
Hardwood, carpet, lino, or tile
When choosing your flooring, you need to decide whether you’d like hardwood, carpet, vinyl, or tile. The option you choose usually depends on the type of room your extension will be (living room, kitchen, bathroom etc) as well as your budget.
-
-
- Hardwood
-
Hardwood flooring is a timeless option because it compliments practically any decor style. It’s easy to clean, lasts for years, and is available in a number of colours. However, wood floor can be a more expensive choice, averaging at between £25 and £70 per m2 to purchase, and £18 per m2 to fit.
-
-
- Carpet
-
Carpet creates a cosier feel in a room and can make your extension feel more homely. There are thousands of colours and patterns available so you’ll have plenty of choice, and it’s more budget-friendly. Per m2, carpet averages at between £7 and £35, and costs around £5 per m2 to fit.
-
-
- Vinyl
-
Lino is a great alternative to wood or tile in rooms that are likely to be in contact with water, such as bathrooms and kitchens. It can be fitted simply, is cost effective, and is easy to clean. Vinyl can be bought for between £5 per m2 and £28 per m2. It’s also reasonably low cost to fit.
-
-
- Tile
-
Tile is an option favoured by those that don’t want hardwood or carpet, but would prefer something slightly more substantial than vinyl. It is incredibly easy to clean and works brilliantly in kitchens and bathrooms, although it can be expensive. Tile can usually be purchased for around £20 per m2 and it can be costly to fit.
Finishing touches and accessories
The final stage of building a house extension is to add finishing touches and accessories that will really help you new extension feel like home. Shop around to find what you like, and look out for any good deals on furniture sets to save yourself some money.
Buy furniture
Buying furniture can be a challenge if you aren’t sure on what you want. Check out Pinterest and browse a number of different stores until you find something you love. Once you’ve found one piece of furniture you like, you’ll know what styles you prefer and it should be easier to find other pieces in a similar style.
It is important to bear in mind though that some furniture is flat packed and will need to be put together, others are not. Some furniture stores offer a ‘building and installation’ service in which their team will put the furniture together for you, once it’s arrived at the property.
Choose accessories
When all your furniture has been delivered and set out in a way that works for you, it’s time to add some accessories to really show your style. This could be anything from some bold, colourful cushions and a furry throw, to a set of stunning curtains and some blackout blinds. Places such as Dunelm and the Range are great for this stage because they sell thousands of different home accessories for a really reasonable cost.
You could also buy some smaller accessories such as candles, picture frames, and ornaments to finish of the decor nicely and tie in the overall theme and style of the room.
Have an extension that you want turning into a kitchen or bathroom?
If you’ve recently had a house extension that you’d like to turn into a bespoke kitchen or bathroom, feel free to get in touch with a member of our team for a personalised quote. You can contact us via email or phone and we’re more than happy to answer any questions you might have about our process.
We offer competitive rates, made-to-measure cabinetry, and quality workmanship, and we are a FENSA certified installer (no. 33734) and fully insured.

Recent Comments